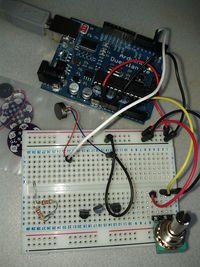
Vibration motor
Jump to navigation
Jump to search
The printable version is no longer supported and may have rendering errors. Please update your browser bookmarks and please use the default browser print function instead.
Les moteurs vibrateurs sont utilisées pour les applications haptiques. Ils peuvent être intégrés à un téléphone, casque, gant, ...
Produits
Exemple de code pour des tests
/*
 Vibration motor test

 Reads an analog input pin, maps the result to a range from 0 to MAXVIB
 and uses the result to set the pulsewidth modulation (PWM) of an output pin.
 Also prints the results to the serial monitor.

 The circuit:
 * potentiometer connected to analog pin 0.
   Center pin of the potentiometer goes to the analog pin.
   side pins of the potentiometer go to +5V and ground
 * Vibration motor connected from digital pin 3 to ground

 Vibration Motor, sku: ROB-08449
 http://www.sparkfun.com/products/8449
 http://www.sparkfun.com/products/8468
 "With a 2-3.6V operating range, these units shake crazily at 3V"

 from the example "Analog input, analog output, serial output"
 originally created 29 Dec. 2008, Modified 4 Sep 2010 by Tom Igoe

 Modified 23 June 2011 by Didier Donsez

 This example code is in the public domain.
 */

const int MAXVIB=180; // 180 is 3.6V if Vin is 5V (Arduino Uno)

const int analogInPin = A0;  // Analog input pin that the potentiometer is attached to
const int analogOutPin = 3; // Analog output pin that the vibration motor is attached to

int sensorValue = 0;        // value read from the pot
int outputValue = 0;        // value output to the PWM (analog out)

void setup() {
  // initialize serial communications at 9600 bps:
  Serial.begin(9600);
}

void loop() {
  // read the analog in value:
  sensorValue = analogRead(analogInPin);
  // map it to the range of the analog out:
  outputValue = map(sensorValue, 0, 1023, 0, MAXVIB);
  // change the analog out value:
  analogWrite(analogOutPin, outputValue);

  // print the results to the serial monitor:
  Serial.print("sensor = " );
  Serial.print(sensorValue);
  Serial.print("\t output = ");
  Serial.println(outputValue);

  // wait 10 milliseconds before the next loop
  // for the analog-to-digital converter to settle
  // after the last reading:

  delay(500);

  analogWrite(analogOutPin, 0);

  delay(500);
}
