UE X2 Introduction Physical Computing: Difference between revisions
| (12 intermediate revisions by the same user not shown) | |||
| Line 8: | Line 8: | ||
Volume Horaire : 60 h (18 h CM et 42 h TD/TP/Projet tutoré) |
Volume Horaire : 60 h (18 h CM et 42 h TD/TP/Projet tutoré) |
||
Modalité du Contrôle Continu : rapports d'étape écrits, rapport écrit final, soutenance orale et démonstration |
|||
| ⚫ | |||
| ⚫ | |||
Prerequisites : Elementary notions of programming and electronics. Notions in C or Java languages are appriciated but not mandatory. |
|||
Prérequis : Notions très élémentaires de programmation et d'électronique. |
|||
Topics: Computer Sciences, Electronic, Instrumentation |
|||
L'informatique physique (''Physical Computing'' en anglais, ''PhyComp'' en abrégé) se concentre sur les interactions avec le monde physique en utilisant une variété de capteurs et actionneurs qui sont contrôlées par des micro-contrôleurs et par des ordinateurs. Une caractéristique importante est que les développeurs ne sont habituellement pas des spécialistes de l'informatique embarquée et omniprésente . Il en résulte des outils de développement qui mettent l'accent sur la simplicité de programmation et de développement de ces types d'applications. |
L'informatique physique (''Physical Computing'' en anglais, ''PhyComp'' en abrégé) se concentre sur les interactions avec le monde physique en utilisant une variété de capteurs et actionneurs qui sont contrôlées par des micro-contrôleurs et par des ordinateurs. Une caractéristique importante est que les développeurs ne sont habituellement pas des spécialistes de l'informatique embarquée et omniprésente . Il en résulte des outils de développement qui mettent l'accent sur la simplicité de programmation et de développement de ces types d'applications. |
||
Le projet [[Arduino]] est un excellent exemple de ce mouvement. Il offre à la fois une carte de prototypage rapide, construite autour d'un micro-contrôleur à faible coût avec quelques ports d'entrée-sortie, et un environnement de développement intégré qui simplifie son utilisation. Cette carte est maintenant largement utilisé dans un large éventail de contextes, notamment: prototypage rapide, le test, et l'éducation autour de l'informatique physique. |
|||
The [http://www.arduino.cc Arduino] project is a prime example of this |
|||
movement. It offers both an experimental board, built around a low cost |
|||
microcontroller with a few input-output ports, and an integrated |
|||
development environment that simplifies its usage. This board is now |
|||
extensively used in a large array of contexts, including: rapid |
|||
prototyping, testing and education around ''physical computing''. |
|||
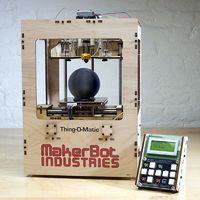
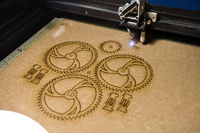
Cette UE présente les aspects techniques du développement de la plateforme [[Arduino]] et de son interfacage avec des postes de travail. Elle offre la possibilité d'acquérir de l'expérience sur la plateforme [[Arduino]] par prototypage d'applications informatiques physiques combinant des capteurs et des actionneurs. Cette UE initie également aux outils numériques de fabrication (découpeuse laser, imprimante 3D, ...) (Voir photos ci-dessous). |
Cette UE présente les aspects techniques du développement de la plateforme [[Arduino]] et de son interfacage avec des postes de travail. Elle offre la possibilité d'acquérir de l'expérience sur la plateforme [[Arduino]] par prototypage d'applications informatiques physiques combinant des capteurs et des actionneurs (comme par exemple, un robot mobile explorateur). Cette UE initie également aux outils numériques de fabrication (découpeuse laser, imprimante 3D, ...) pour réaliser le chassis et la coque des objets intelligents prototypés. (Voir photos ci-dessous). |
||
=Programme détaillé= |
|||
=Program Summer 2013= |
|||
== |
==Chapitre I : Basics in theoretical and practical electronics== |
||
Instructors: Sophie Chareyron, David Eon, Maxime Besacier |
Instructors: Sophie Chareyron, David Eon, Maxime Besacier |
||
| Line 37: | Line 32: | ||
''All you need to know to start in electronics !'' |
''All you need to know to start in electronics !'' |
||
== |
==Chapitre II : Introduction to Physical Computing with Arduino== |
||
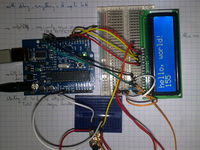
[[Image:Arduino_el1602a_1.jpg|thumb|right||200px|Arduino + LCD]] |
[[Image:Arduino_el1602a_1.jpg|thumb|right||200px|Arduino + LCD]] |
||
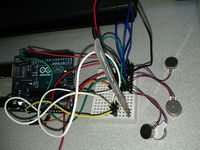
[[Image:HapticGlovev0.jpg|thumb|right|200px|Haptic Glove v0.1]] |
[[Image:HapticGlovev0.jpg|thumb|right|200px|Haptic Glove v0.1]] |
||
| Line 71: | Line 66: | ||
** Practicals: Advanced cicuits |
** Practicals: Advanced cicuits |
||
== |
==Chapitre III : Robotic with Arduino== |
||
[[Image:MagicianChassis5.jpg|thumb|right||200px|Magician Chassis for robotic arduino]] |
|||
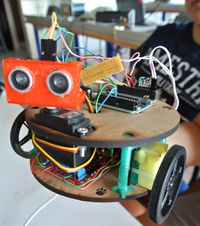
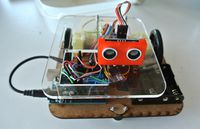
[[Image:HomebrewRobot1.jpg|thumb|right||200px|Homebrew Robot chassis with arduino]] |
[[Image:HomebrewRobot1.jpg|thumb|right||200px|Homebrew Robot chassis with arduino]] |
||
[[Image:HomebrewRobot2.jpg|thumb|right||200px|Homebrew Robot chassis with arduino]] |
[[Image:HomebrewRobot2.jpg|thumb|right||200px|Homebrew Robot chassis with arduino]] |
||
| Line 89: | Line 83: | ||
* Student project (by group of two) : Design and realization of an autonomous mobile robot based on the [[Magician Chassis]] |
* Student project (by group of two) : Design and realization of an autonomous mobile robot based on the [[Magician Chassis]] |
||
== |
==Chapitre IV : Introduction to Fablab (Factory Laboratory)== |
||
[[Image:logofablab.jpg|thumb|right|200px|Fablab logo]] |
[[Image:logofablab.jpg|thumb|right|200px|Fablab logo]] |
||
[[Image:makerbot-thing-o-matic.jpg|thumb|right|200px|Makerbot'Thing-o-Matic 3D printer]] |
[[Image:makerbot-thing-o-matic.jpg|thumb|right|200px|Makerbot'Thing-o-Matic 3D printer]] |
||
[[Image:lasercutter1.jpg|thumb|right|200px|Laser cutter in action]] |
[[Image:lasercutter1.jpg|thumb|right|200px|Laser cutter in action]] |
||
Instructor: |
Instructor: Ingénieur Plateformes Persyval |
||
Duration: 8 hours (one morning, one afternoon) |
Duration: 8 hours (one morning, one afternoon) |
||
Location: |
Location: Campus |
||
* Introduction : What is a "Fablab" (Factory Laboratory)? |
* Introduction : What is a "Fablab" (Factory Laboratory)? |
||
* Introduction to the machines and the tools : laser cutters, vinyl cutter, CNC mill, reprap, 3D printers. |
|||
* Visit of the [http://www.ccsti-grenoble.org/02_programme.php?code_ana=FAB# CCSTI Expo on Fablab] |
|||
* Introduction to |
* Introduction to materials : Wood, Vinyle, [[PMMA]], [[Polycaprolactone]], ... |
||
* Introduction to 2D/3D CAD tools |
|||
* Class on digital construction (CAD / CAM) |
* Class on digital construction (CAD / CAM) |
||
* Designing / cutting / adapting / expending of robot [[Magician Chassis]]. |
* Designing / cutting / adapting / expending of robot [[Magician Chassis]]. |
||
| Line 110: | Line 105: | ||
* Construction |
* Construction |
||
* Evaluation / ideas for new projects / possible uses |
* Evaluation / ideas for new projects / possible uses |
||
==Part V : Introduction to Product Design== |
|||
Instructor: Jean-Baptiste Joatton ([[Pôle Supérieur de Design de Villefontaine]]) |
|||
Duration: 2 half-days |
|||
Location: CCSTI Grenoble |
|||
* Introduction : design school of Villefontaine |
|||
* Panorama : more than 50 design disciplines |
|||
* Design definitions |
|||
* Review of a few design process (Design thinking) |
|||
* Design in business (Design ladder) |
|||
* Interaction design short workshop ("Visit an exhibition") |
|||
=Livres= |
=Livres= |
||
Latest revision as of 06:57, 13 July 2013
Introduction à l'Informatique Physique / Introduction to Physical Computing (PhyComp)
Date: Ouverture Janvier 2014
Contact: David Eon.
Volume Horaire : 60 h (18 h CM et 42 h TD/TP/Projet tutoré)
Modalité du Contrôle Continu : rapports d'étape écrits, rapport écrit final, soutenance orale et démonstration
Code APOGEE : ???
Prérequis : Notions très élémentaires de programmation et d'électronique.
L'informatique physique (Physical Computing en anglais, PhyComp en abrégé) se concentre sur les interactions avec le monde physique en utilisant une variété de capteurs et actionneurs qui sont contrôlées par des micro-contrôleurs et par des ordinateurs. Une caractéristique importante est que les développeurs ne sont habituellement pas des spécialistes de l'informatique embarquée et omniprésente . Il en résulte des outils de développement qui mettent l'accent sur la simplicité de programmation et de développement de ces types d'applications.
Le projet Arduino est un excellent exemple de ce mouvement. Il offre à la fois une carte de prototypage rapide, construite autour d'un micro-contrôleur à faible coût avec quelques ports d'entrée-sortie, et un environnement de développement intégré qui simplifie son utilisation. Cette carte est maintenant largement utilisé dans un large éventail de contextes, notamment: prototypage rapide, le test, et l'éducation autour de l'informatique physique.
Cette UE présente les aspects techniques du développement de la plateforme Arduino et de son interfacage avec des postes de travail. Elle offre la possibilité d'acquérir de l'expérience sur la plateforme Arduino par prototypage d'applications informatiques physiques combinant des capteurs et des actionneurs (comme par exemple, un robot mobile explorateur). Cette UE initie également aux outils numériques de fabrication (découpeuse laser, imprimante 3D, ...) pour réaliser le chassis et la coque des objets intelligents prototypés. (Voir photos ci-dessous).
Programme détaillé
Chapitre I : Basics in theoretical and practical electronics
Instructors: Sophie Chareyron, David Eon, Maxime Besacier
Duration : 4 hours
Location: Polytech Grenoble
All you need to know to start in electronics !
Chapitre II : Introduction to Physical Computing with Arduino
Instructor: O. Richard
Duration: 16 hours
Location: Polytech Grenoble
Dedicated page: Introduction to Physical Computing
- Introduction Physical Computing
- Definition, Principles and Examples
- Presentation Arduino Project in brief
- Arduino Board, Environment
- Arduino Language
- Practicals: First Arduino Board Use
- Components of Physical Computing
- Microcontroller in brief
- Sensors and Actutors
- Arduino Language:
- Variable, Control Structure
- Input/Ouput Operations
- More about Language
- Practicals: Second Arduino Board Use
- Communication: Computer - Arduino
- Serial, Bluetooth, Xbee (with Android phone)
- Language for Computer: Processing
- Practicals: Advanced cicuits
Chapitre III : Robotic with Arduino
Instructors : Sophie Chareyron, David Eon, Maxime Besacier
Duration: 16 hours
Location: Polytech Grenoble
- Basics in Robotics
- Motors driving (power electronics)
- Object detection (interfacing sensors)
- Programming of robot’s behaviors : path following, Labyrinth exploration, ...
- Communication between robots (IrDA, zigbee, bluetooth)
- Student project (by group of two) : Design and realization of an autonomous mobile robot based on the Magician Chassis
Chapitre IV : Introduction to Fablab (Factory Laboratory)
Instructor: Ingénieur Plateformes Persyval
Duration: 8 hours (one morning, one afternoon)
Location: Campus
- Introduction : What is a "Fablab" (Factory Laboratory)?
- Introduction to the machines and the tools : laser cutters, vinyl cutter, CNC mill, reprap, 3D printers.
- Introduction to materials : Wood, Vinyle, PMMA, Polycaprolactone, ...
- Introduction to 2D/3D CAD tools
- Class on digital construction (CAD / CAM)
- Designing / cutting / adapting / expending of robot Magician Chassis.
- ‘Homework’ : design a snap fit construction kit
- Review of homework
- Cutting / milling of kits
- Construction
- Evaluation / ideas for new projects / possible uses
Livres
- Massimo Banzi, Getting Started with Arduino, Pub. Make; 1 edition (October 15, 2008) ISBN-10: 0596155514
- Tom Igoe, Making Things Talk: Practical Methods for Connecting Physical Objects, Make; 1 edition (September 28, 2007), ISBN-10: 0596510519 (source of examples). Second Edition, Released: August 2011 (est.) ISBN-10: 1449392431, ISBN-13: 978-1449392437, http://oreilly.com/catalog/0636920010920
- Joshua Noble, Programming Interactivity: A Designer's Guide to Processing, Arduino, and OpenFrameworks, O'Reilly Media, July 2009 (source code)
- Jonathan Oxer et H. Blemings, Practical Arduino: Cool Projects for Open Source Hardware, Apress, Janvier 2010, http://www.practicalarduino.com, http://books.google.fr/books?id=iwzo1-zmVXEC
- Donald A. Norman, The Design of Everyday Things, Publisher: Basic Books; ISBN-13: 978-0465067107, google books
Ressources
- Physical Computing: http://www.tigoe.net/pcomp/
- Arduino: http://www.arduino.cc/
- Pratice support: http://www.sparkfun.com/tutorial/AIK/ARDX-EG-SPAR-PRINT-85.pdf
- Processing: http://processing.org
- OpenProcessing: http://www.openprocessing.org
